Do you know how often your customers use Facebook?
A survey by the Pew Research Center of more than 1,500 US adults reveals that more than 50% visit Facebook several times a day.
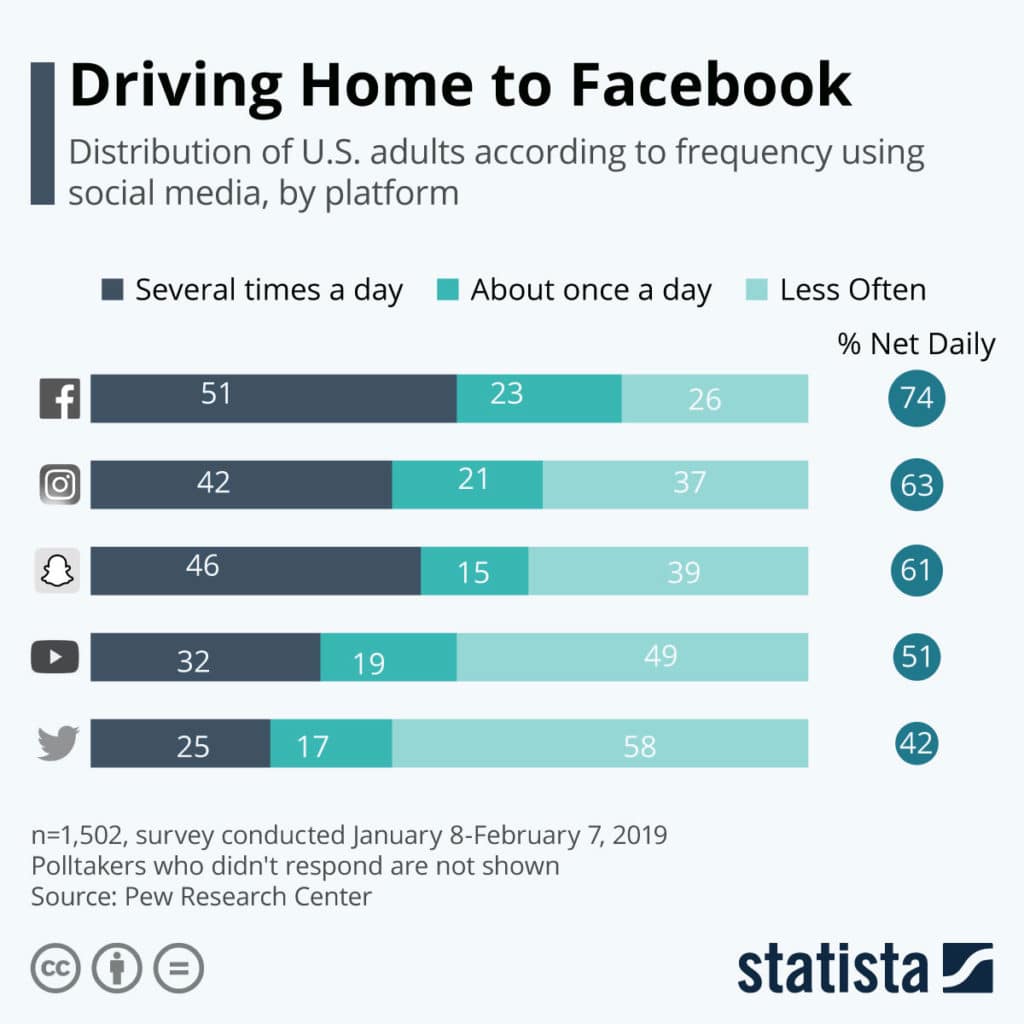
Instagram, which belongs to the Facebook family of apps and services, is the second most popular social media platform among those surveyed — over 40% of users check Instagram several times a day.
If you can master Facebook ad scheduling, half the battle will be won. In this tutorial, we’ll not only show you how to schedule ads on Facebook and its placements but highlight how you can deliver them at the right moment.
Let’s start!
Facebook Ad Scheduling: Dayparting vs Automating
Facebook ad scheduling is a great opportunity to learn more about the people you target, effectively spend your budget, and save time on planning your marketing campaigns.
There are two ways you can plan your ad schedule: Facebook runs ads on schedule (automatically) or allows you to take control and set an ad schedule manually.
When you're just getting started, we recommend automatic scheduling. One of the cool things about advertising with Facebook is that the system adapts to your actions to better understand your needs and provide you with a higher return on investment.
After testing ad scheduling automation, you can schedule your ads manually and use Facebook dayparting. When it comes to Facebook ads, dayparting is a synonym for scheduling.
This technique allows you to run your ads within the viewer’s time zone, so you can schedule your ads for any day of the week and any hour you need.
To schedule your ads, go through these seven steps:
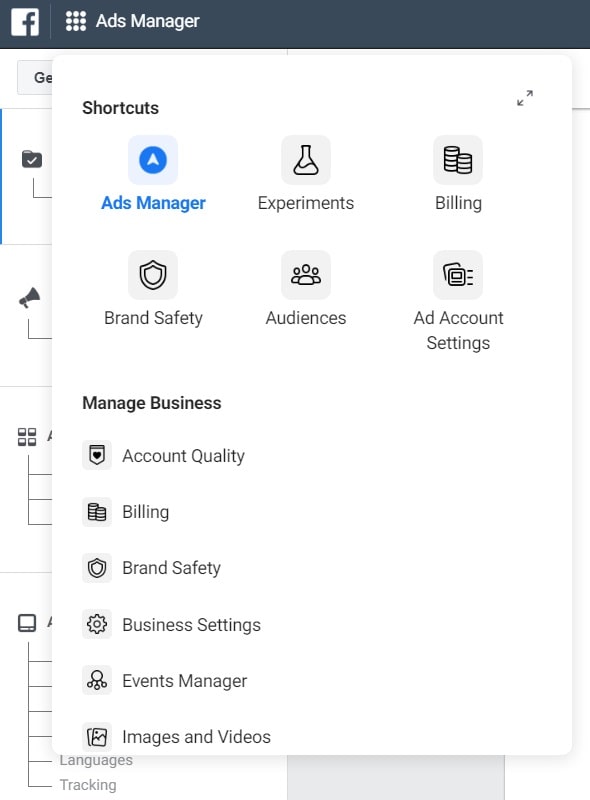
Step 1. Launch Facebook Ads Manager.
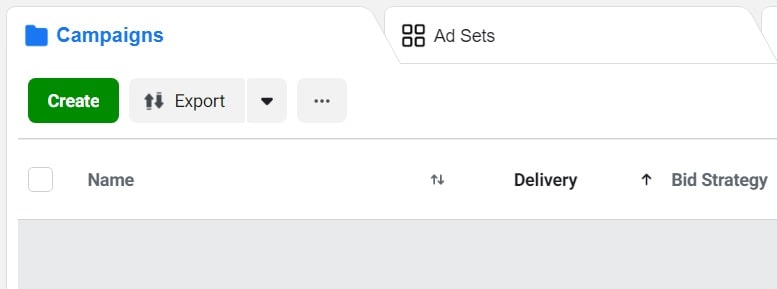
Step 2. Click Create to start a new ad campaign or create a new ad set.
Step 3. After you pick an advertising objective, choose Lifetime Budget as the Campaign Budget and click Show Advanced Options in the Campaign Budget Optimization section below.
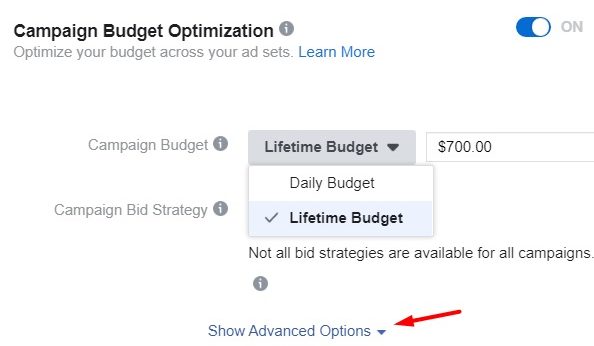
NOTE: The Facebook ad change schedule feature is available only with lifetime budgets.
Step 4. Choose the Run ads on a schedule option in Ad Scheduling.

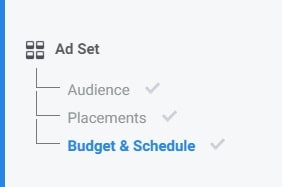
Step 5. Go to the Budget & Schedule level of your ad set.
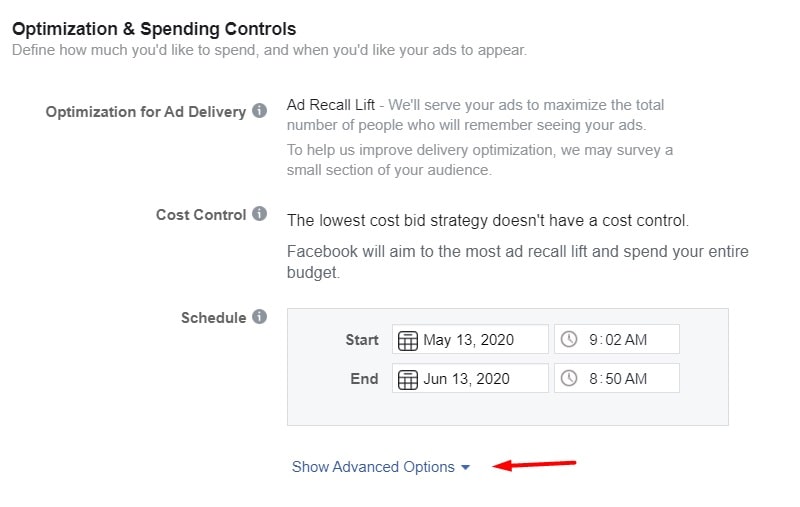
Step 6. In the Optimization & Spending Controls section, click Show Advanced Options.
Step 7. Schedule your ad for specific hours and days of the week within the viewer’s time zone or your ad account’s time zone.
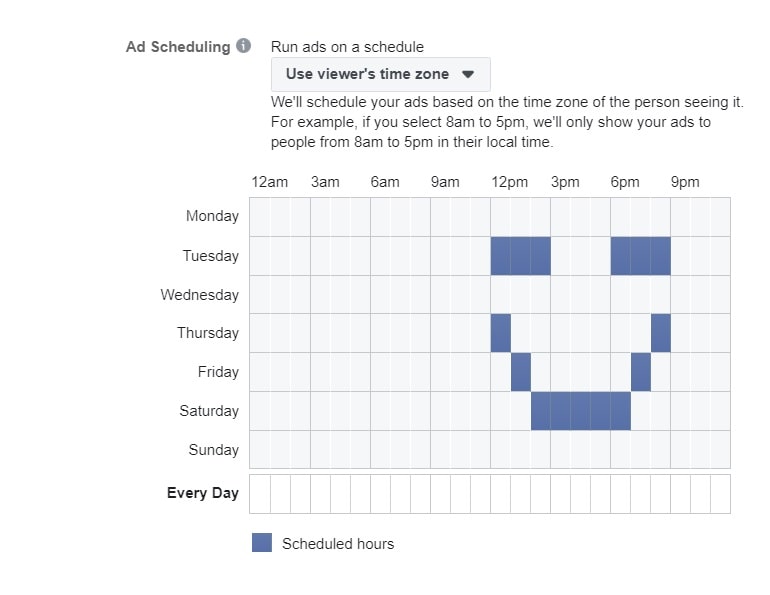
Basically, that’s how Facebook schedules ads. After you finish creating your ad campaign or ad set, you can launch it immediately or save it for future use.
How to Schedule Ads on Facebook for the Right Time
Read these recommendations to hit your target audience at the right moment.
Avoid Prime Time and Weekends
If you schedule Facebook ads for the time when people are most active (e.g. prime time), note that the cost of your ads will likely be higher because the number of advertisers who target the same audience as you will be higher.
You can kill two birds with one stone and spend less on ads if you find the perfect time window within off-peak hours. For example, you can test morning hours when people have just woken up and are more open to something new.
Obviously, weekends aren’t good for ad scheduling on Facebook. Over the weekend, conversions drop because people spend their time differently than during the rest of the week. That’s why you should think twice about scheduling your ads on Saturday or Sunday.
Keep an Eye on Ad Performance
By monitoring your Facebook ads, time scheduling becomes easier.
First of all, you can discover the best time for ad delivery. Second, you can adjust your schedule as necessary based on real-time data. Third, there are several ways you can see this data.
- Facebook Analytics allows you to analyze detailed omnichannel, funnel, retention, and other reports and helps you better understand your target audience thanks to machine learning.
- Ads Reporting allows you to create custom reports based on different parameters, functions, and filters.
- Page Insights allows you to see general timing statistics on your Facebook Page and posts you publish there.
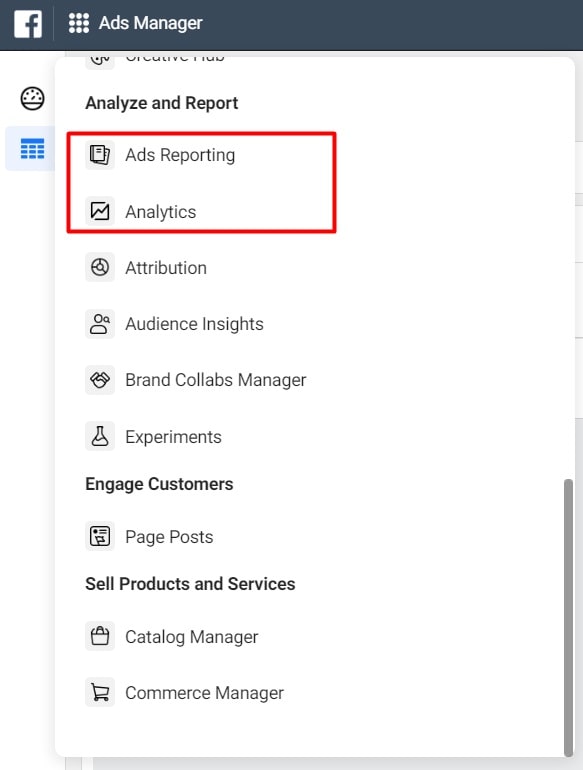
You can find the Facebook Analytics and Ads Reporting tools in the Analyze and Report section of the dropdown menu in Facebook Business Manager.
If you want to try the third method, go to your Page and click Insights at the top.

From there, you can see statistics about your ads, likes, reach, posts, actions on your Page, events, stories, and much more.
Set Automated Rules
Automated Rules is a feature that will help you carefully manage your ad schedule on Facebook, especially if you run tens or hundreds of ads at the same time.
Say your ad doesn’t perform as well as you wanted or you want to increase the budget for your ads once they’re launched or you want to increase your bid to have a better chance of winning an ad auction.
In all these cases, you can create automated rules to stop or upgrade your ad campaigns or ad sets or get notifications on their performance.
To create an automated rule, you need to:
Step 1. Launch Ads Manager and check the box near the ad campaign or ad set you want to create a rule for.
Step 2. Click the Rules dropdown.

Step 3. Pick the Create A New Rule option.
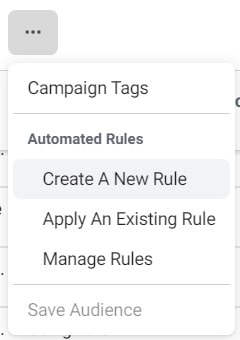
Step 4. Create your automated rule.
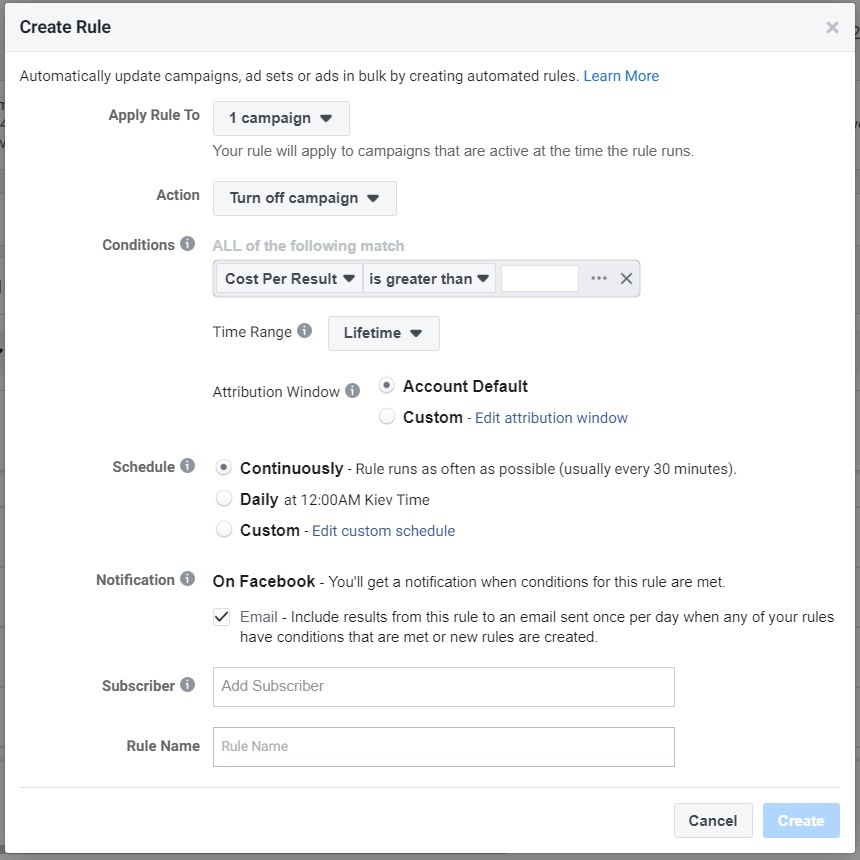
Here you need to choose the ad campaigns or ad sets you want to control, the action that meets your rule, the conditions that trigger your rule, the number of days’ worth of data you’d like to apply your rule to, and other details about your rule.
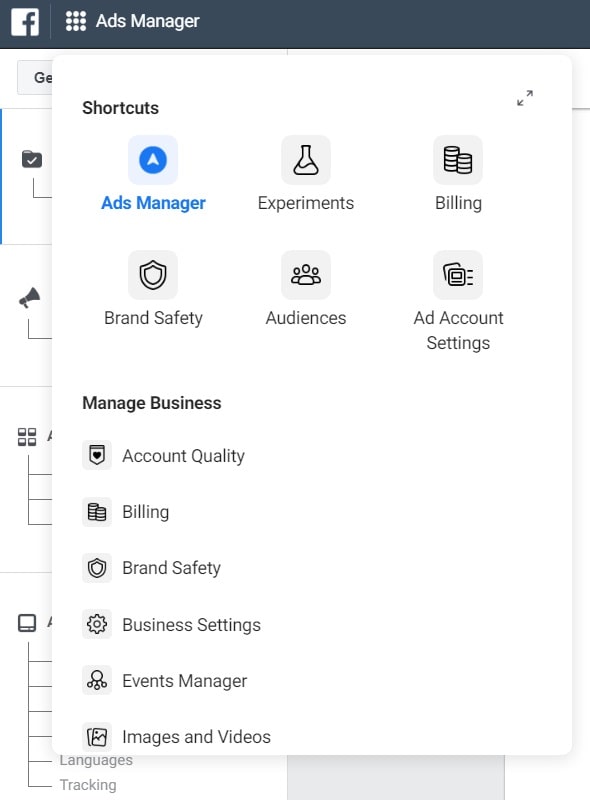
Once you’re ready, click Create to make your rule active. To track your rules, click Automated Rules in the Advertise section of the Facebook Business Manager dropdown menu.

![featured image thumbnail for post The Rookie’s Guide to Creative Facebook Ads [30 Examples]](/static/596e56a60d16703bc60c5005333383ae/188f6/creative-facebook-ads-featured-image.jpg)
